Main interface | Function and purpose |
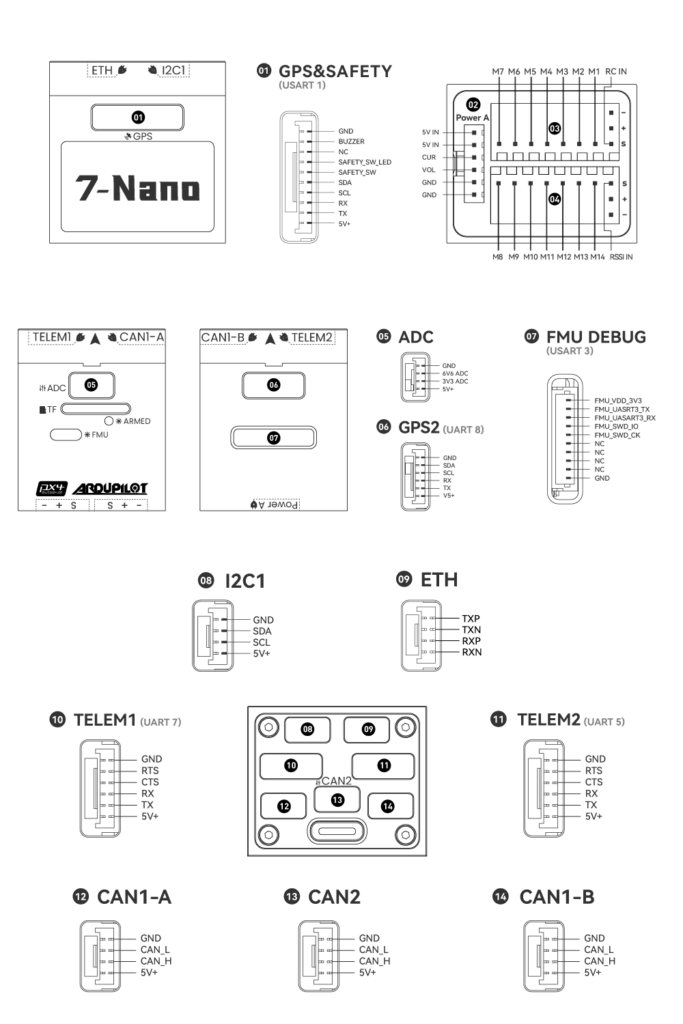
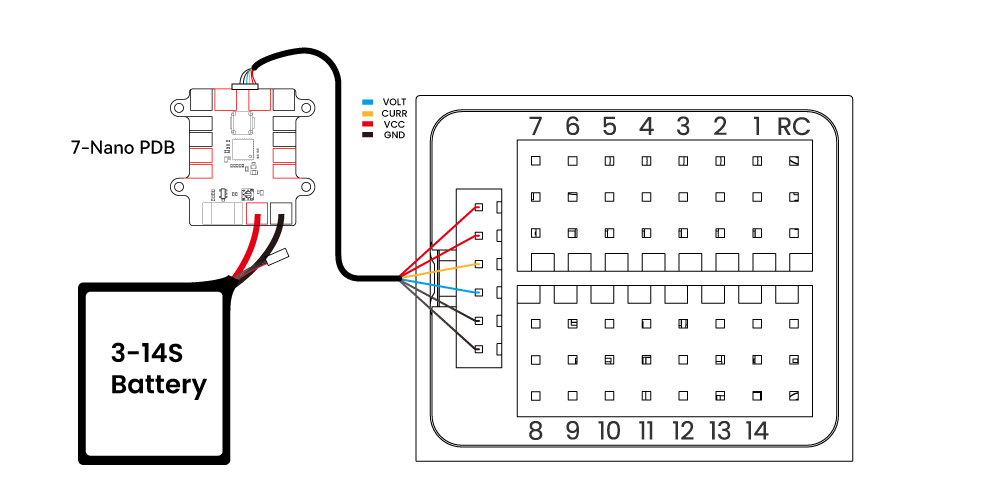
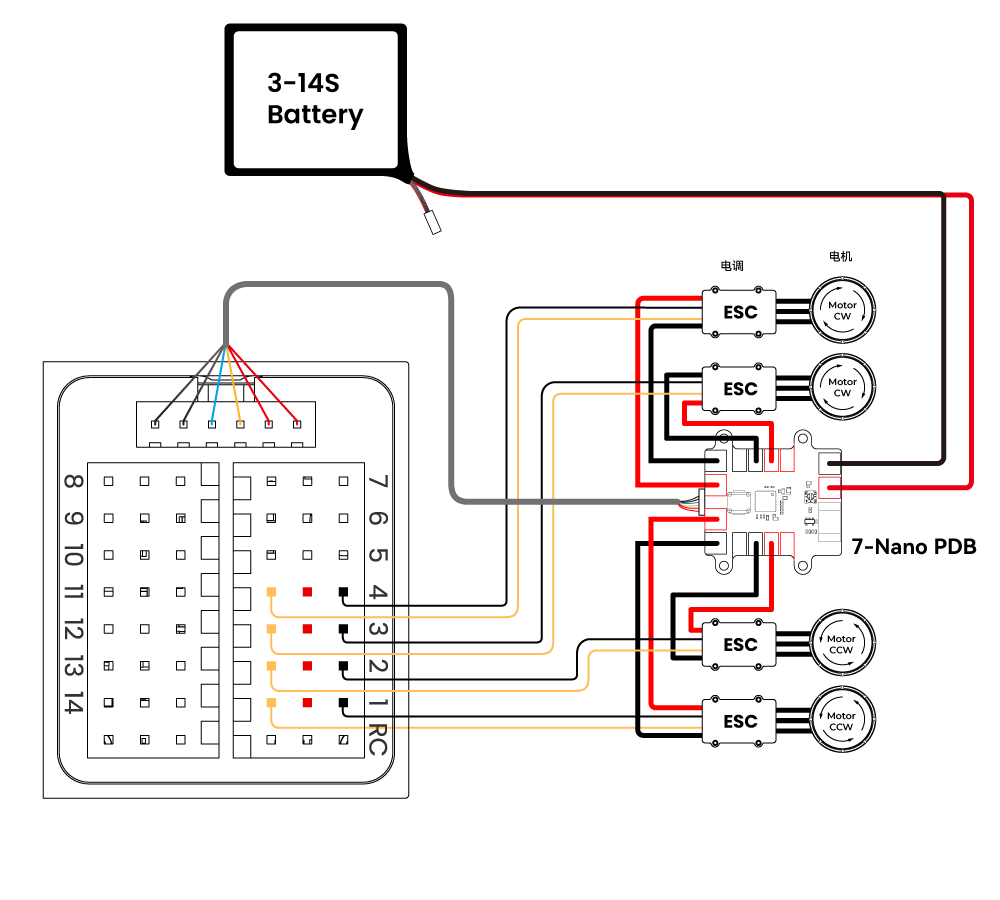
| POWER A | Connects to 7-Nano PDB; has power input & AD voltage and current detection function |
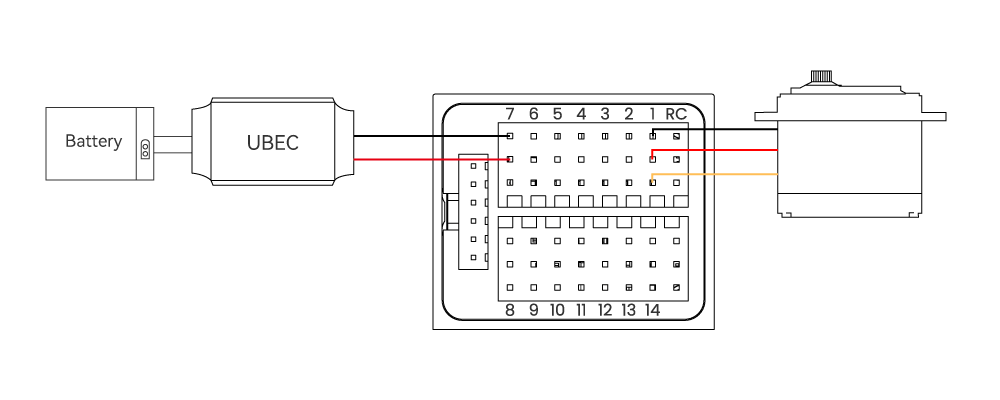
| M1~M14 | PWM signal output port, which can be used to control motors or servos; and M1~M8 can be configured as 5V PWM |
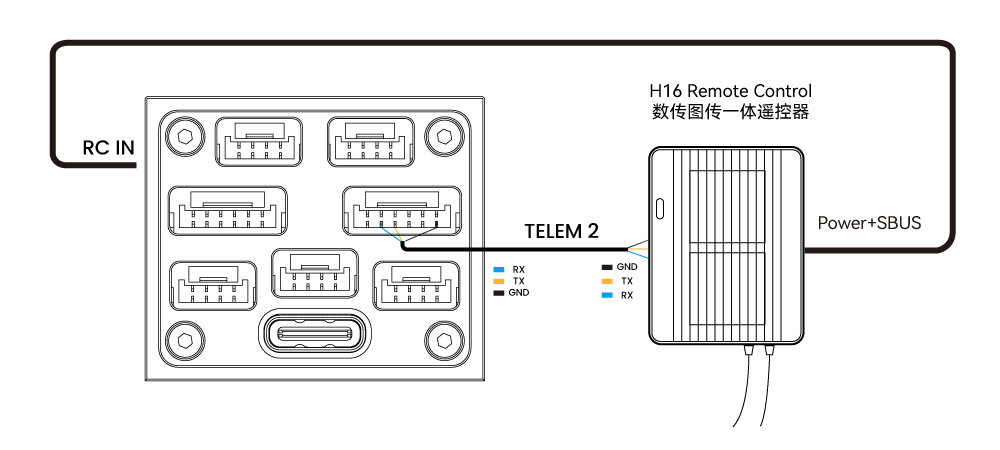
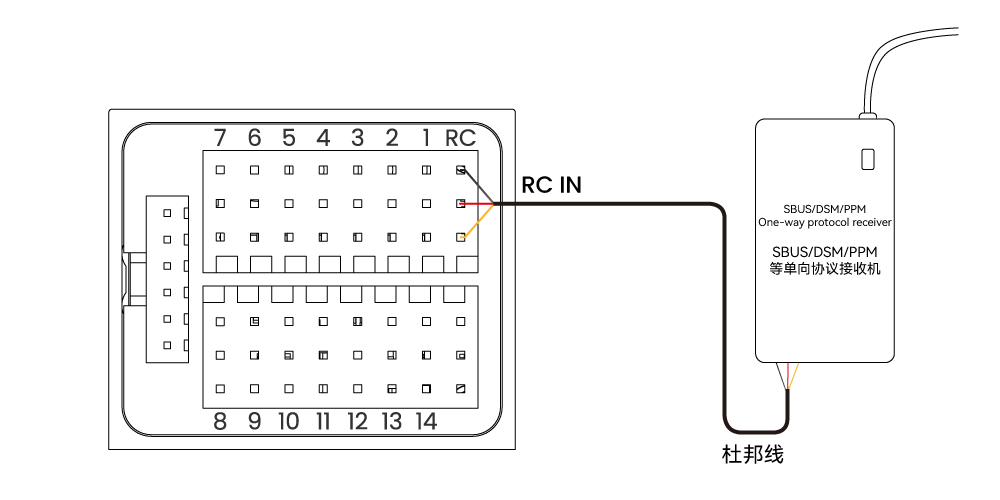
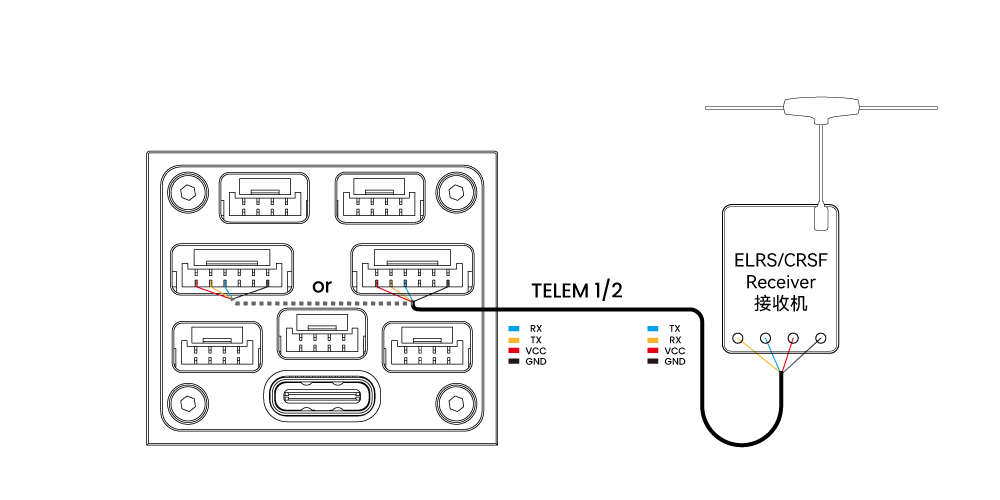
| RC IN | Connect remote control receivers with one-way protocols such as SBUS/DSM/PPMD (ELRS/CRSF receivers should be connected to any serial port, not RCIN) |
| RSSI | Used to connect the signal strength backhaul module |
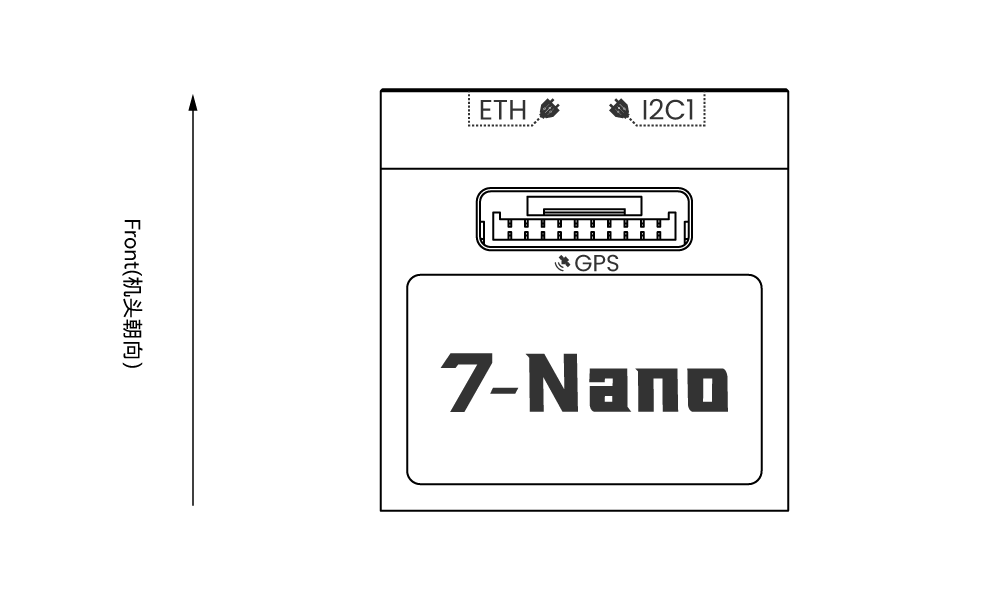
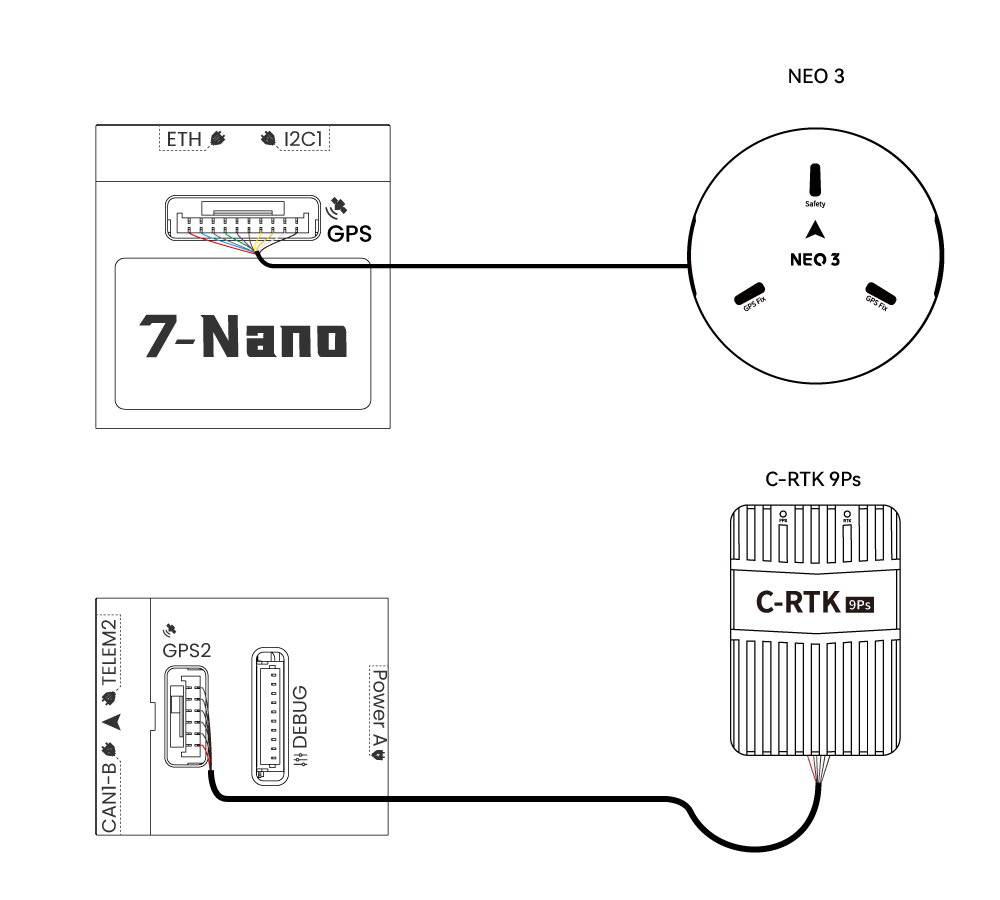
| GPS&SAFETY | Connect to the Neo series GPS or C-RTK series RTK (it includes GPS, safety switch, and buzzer interfaces) |
| GPS2 | Can be used to connect to GPS/RTK |
| DEBUG | Used for FMU chip debugging, reading DEBUG device information, and can be configured for other serial port purposes for Ardupilot |
| ADC | Contains ADC3.3 and ADC6.6, which can be used for analog-level signal detection |
| TF CARD | Insert an SD card to realize the log storage function |
| ETH | An Ethernet interface can be used to connect Ethernet devices, such as accompanying computers. |
| I2C | Connect to I2C devices, such as external compasses, for communication between the flight control and the I2C devices. |
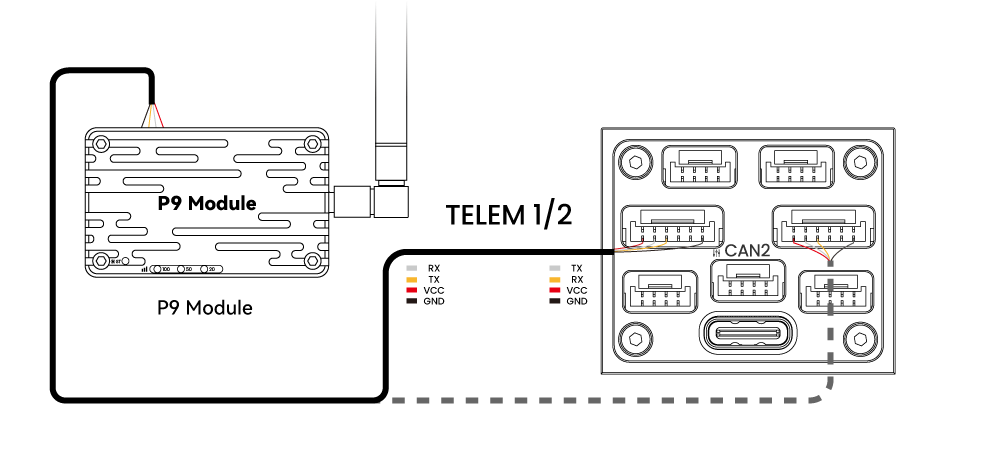
| TELEM1/TELME2 | Connect data transmission, etc., used for MAVLINK interactive data |
| CAN1-A/B | CAN1 port, connected to UAVCAN equipment such as CAN GPS, used for communication between the flight control and UAVCAN equipment (such as connecting NEO3 pro UAVCAN GPS) |
| CAN2 | Connect to UAVCAN devices such as CAN GPS for communication between flight control and UAVCAN devices (such as connecting NEO3 pro UAVCAN GPS) |
| TYPE C | The flight controller USB interface can connect to the ground station, burn firmware, and perform other operations |