The C-RTK series centimeter-level positioning system is a high-precision RTK positioning system independently developed by CUAV, which can be widely used in unmanned systems and high-precision positioning fields.
In the manufacturing cycle are:
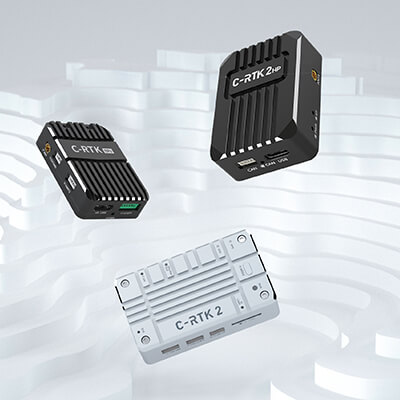
C-RTK 9Ps Haeding(need dual module) and RTK system
C-RTK2 PPK and RTK system
C-RTK2 HP Haeding and RTK system
Tip
If you do not need centimeter-level positioning RTK, you can choose NEO series gps module。
C-RTK Series Version Difference
C-RTK 9PS
C-RTK2
C-RTK2 HP
MCU
–
STM32H743
STM32F4
Sensor
IST8310
RM3100+ICM-20689
RM3100+ICM-42688P
Gnss receiver
ublox F9P
ublox F9P
high-performance GNSS SoC
Channel
184
184
1408
Gnss
Four-star multi-frequency
Four-star multi-frequency
Four-star multi-frequency
band
L1/L2/G1/G2
L1/L2/G1/G2
L1/L2/L5/G1/G2
B1I/B2I/E1b/E5b
B1I/B2I/E1b/E5b
B1/B2/B3I/E1/E5a/E5b
RTK
√
√
√
PPK
×
√
×
Haeding
√(dual module)
x
√(one module)
Antenna
1
1
2
Communication sport
UART/USB
Droncan/UART
Dronecan/UART/USB
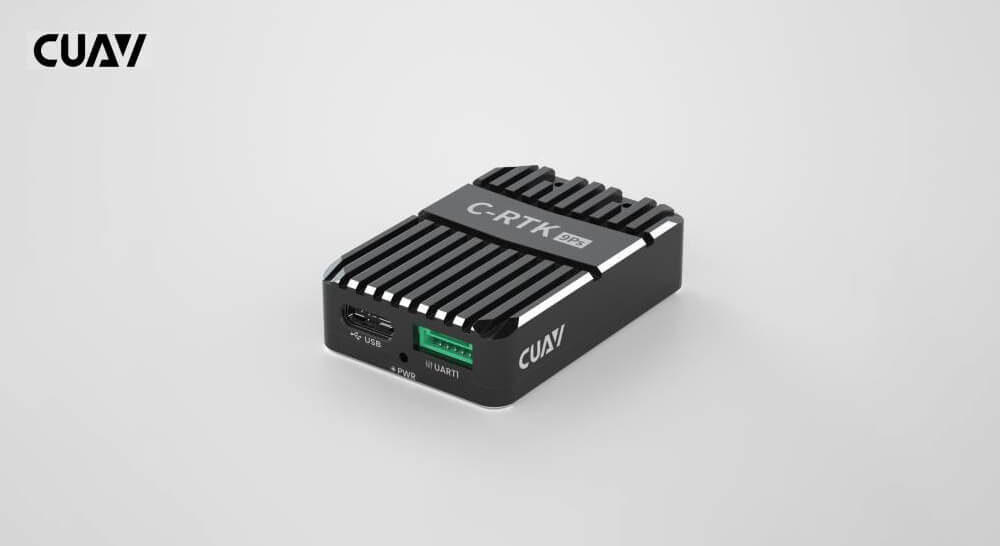
C-RTK 9Ps Centimeter-level Positioning Module
C-RTK 9Ps is a four-star real-time GNSS system that uses two C-RTK 9Ps modules, one for the aircraft and one for the base station. It also supports dual GPS for yaw, replacing the controller’s internal magnetic compass, allowing the device to adapt to complex magnetic field environments. Compared with C-RTK 9P, C-RTK 9Ps achieves similar performance at a lower price; it is a centimeter-level positioning module with extremely high cost performance. Compatible with controllers running PX4/ArduPilot firmware, it is an ideal choice for applications that require real-time high-precision navigation, such as aerial performances, agricultural applications, high-precision takeoffs and landings, and ship takeoffs and landings.
RTK 20Hz RAW 25Hz; PVT 25Hz (The maximum limit is related to the concurrency setting; please refer to the subsequent navigation refresh rate chapter for details.)
Active CW detection and removal, Onboard band pass flter
Anti-spoofng
Advanced anti-spoofing algorithms
Antenna gain
Rover:2dBi
Base:5dBi
PPK
not support
GPS heading
Support (requires two C-RTK 9Ps); heading accuracy: 0.4edg (reference value)
Base/Rover role swap
Support
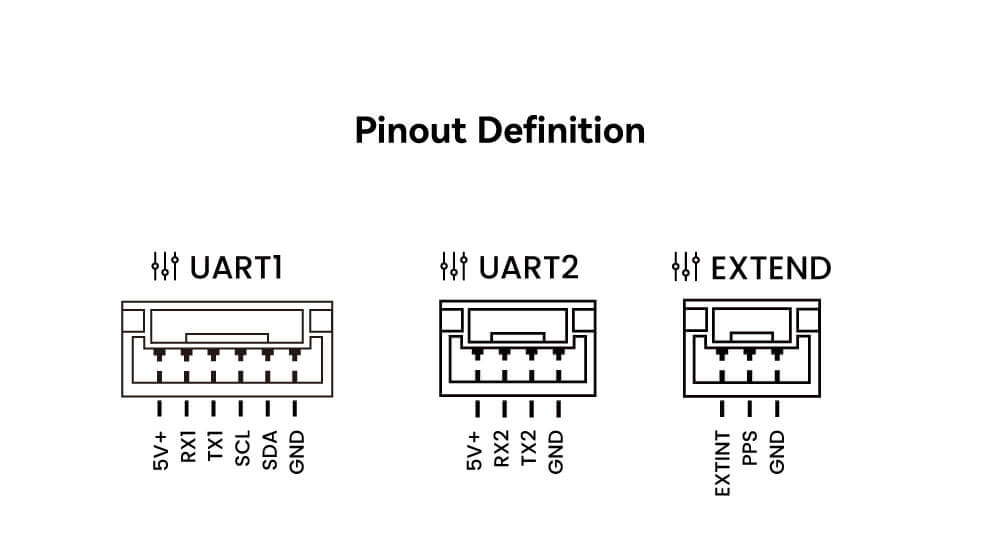
UART
2 UART
USB
1
Protocols
NMEA、UBX binary、RTCM 3.x
Operating voltage
4.5V to 6V
Operating temperature
–40°C to +85°C
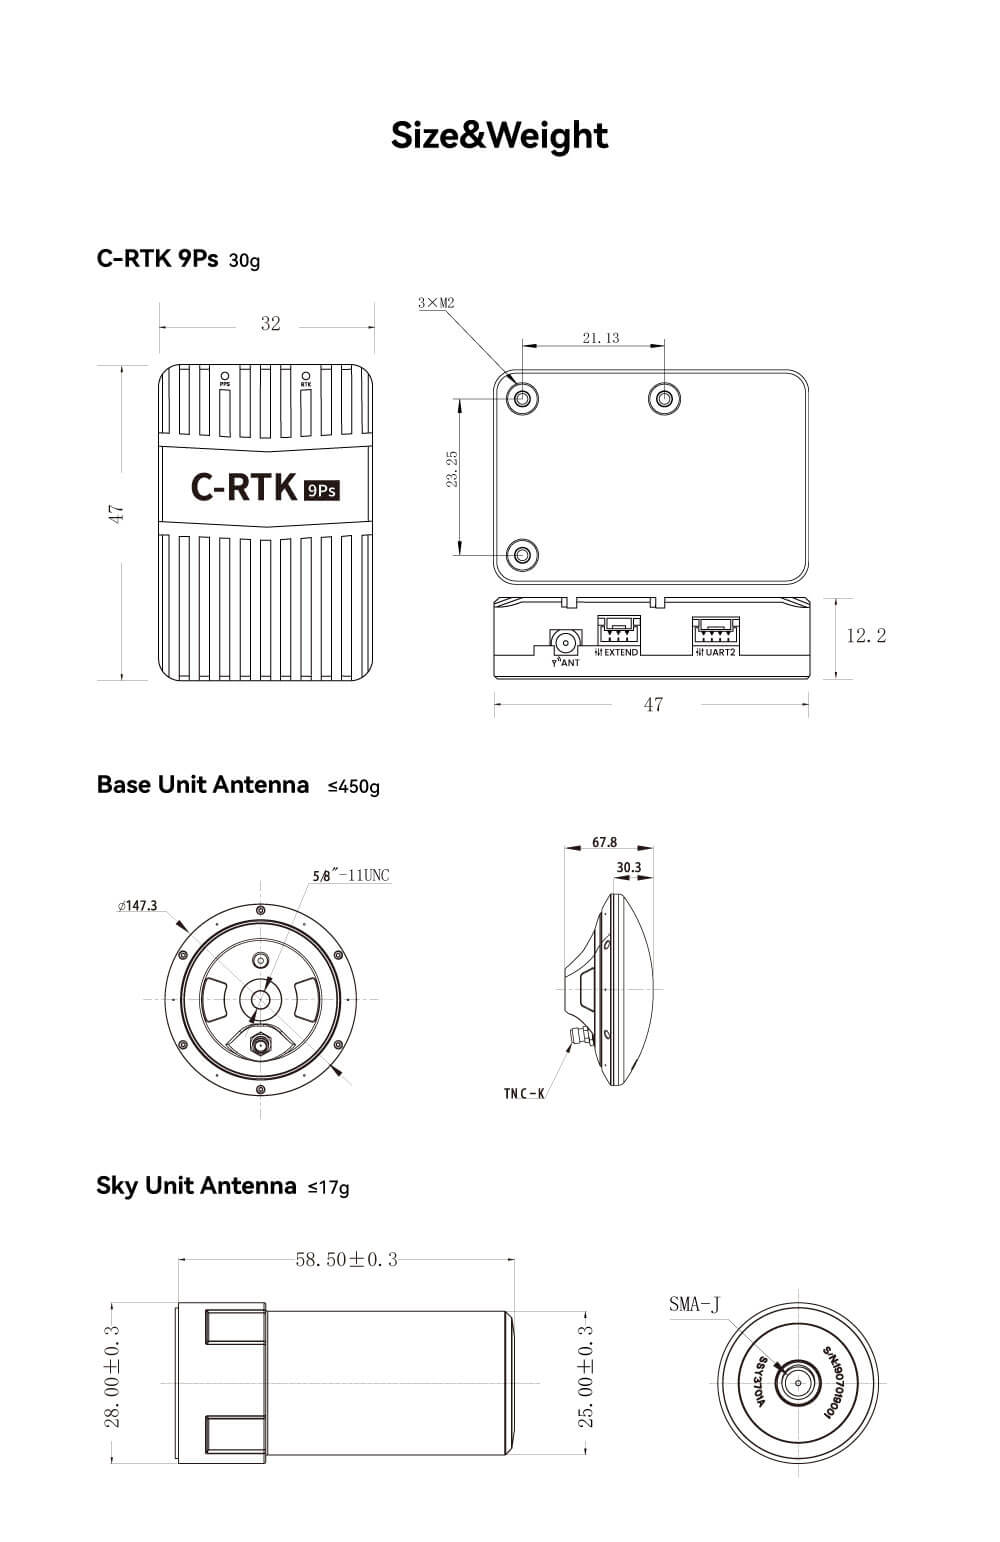
Size and Weight
Pinouts
LED
PPS
Always bright: NO fixes
Flashing: GNSS positioning succeeded
RTK
lights off: No access to RTK
Always bright: RTK fixes
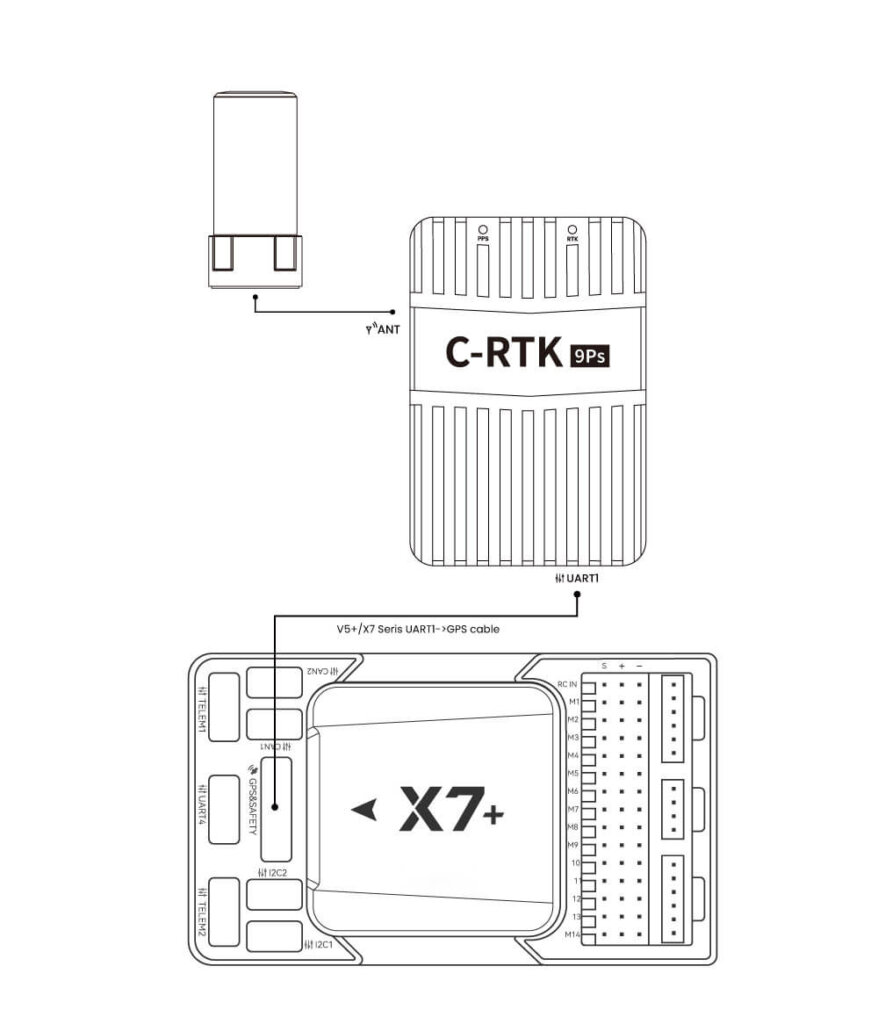
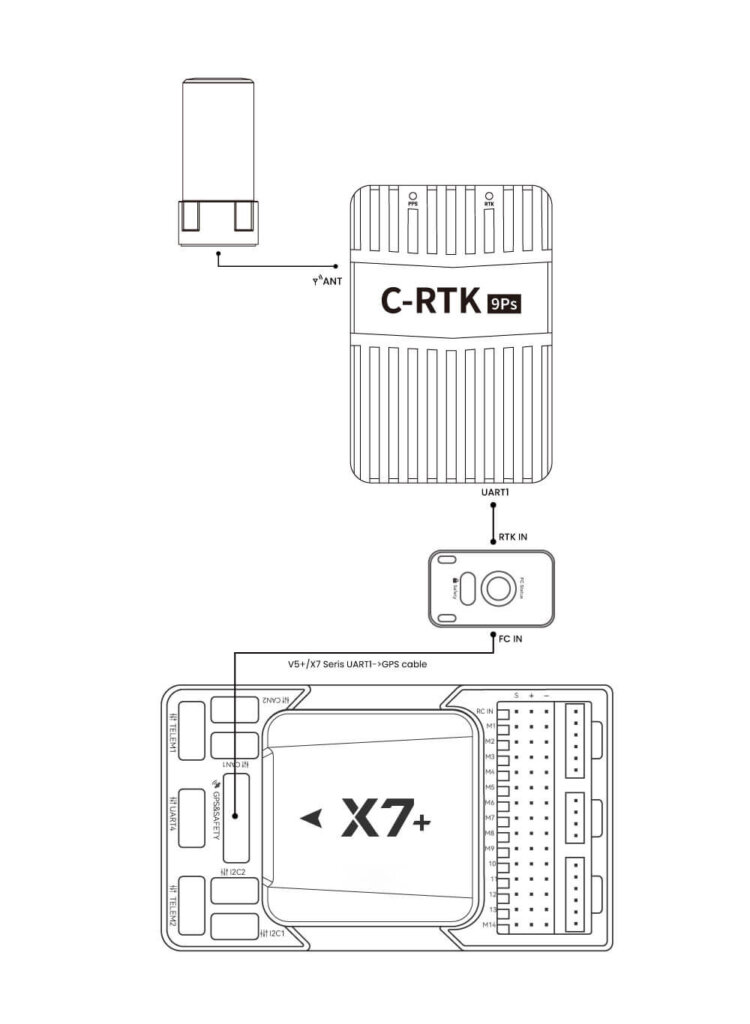
Rover hardware connection
As the first GPS:
Use a special cable to connect the C-RTK 9Ps (UART1) interface to the Controller’s GPS interface. As a second GPS:
Use a dedicated line to connect the C-RTK 9Ps (UART1) interface to the Controller UART4 interface.
If the flight controller is running ArduPilot firmware, please set GPS_TYPE2 to 1.
GPS+safety switch (USL module):
Note
USL modules need to be purchased separately; you can also use ordinary safety switches to rewire for DIY.
Connect the antenna to the Rover
Connect C-RTK 9ps (Rover) to the Controller (Hardware Connection)
Connect the data transmission to the Telem1 interface of the Controller
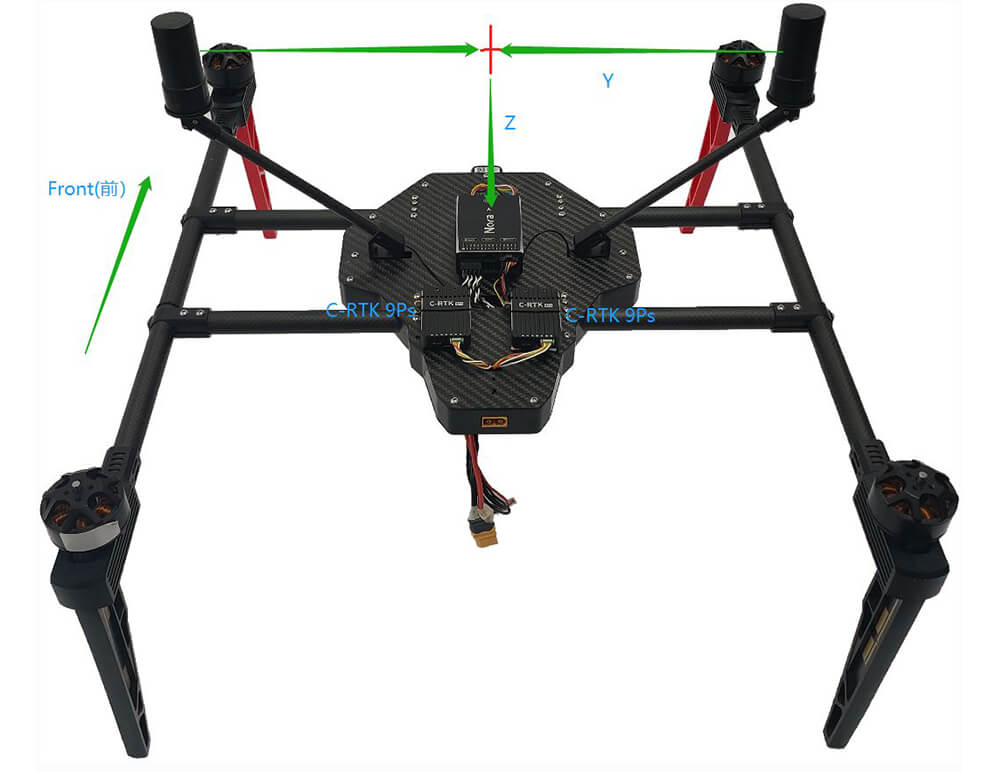
Install C-RTK 9ps on the vehicle in the correct direction (generally, the installation direction of C-RTK 9ps should be consistent with the direction of the aircraft)
Tip
Due to the configuration of the IST8310, the ArduPilot will automatically be set to yaw 270 during calibration. This is normal, please do not modify it.
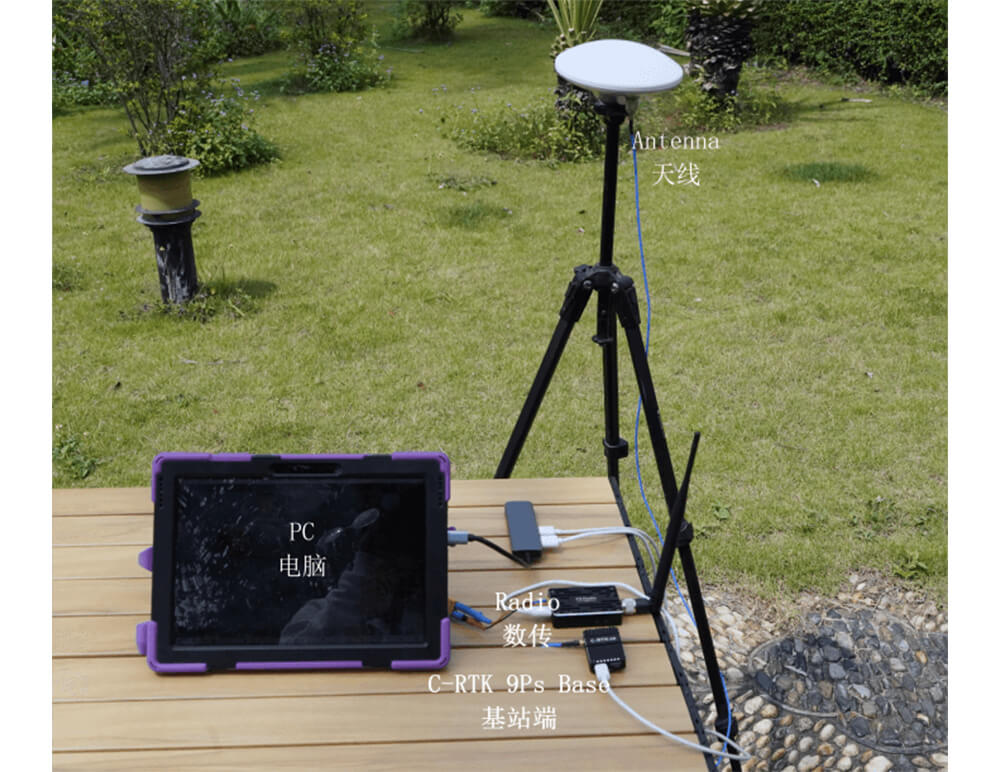
Rtk base hardware connection
Use a tripod to elevate the antenna of the Rtk base, and use a feeder to connect the antenna to the base station.
You need to use Missionplanner/QGroundControl for base station setup.
Two C-RTK 9Ps modules can be used to estimate yaw in place of a magnetic compass, which may be subject to external magnetic interference or electromagnetic interference from the drone’s motors and ESCs.
Note
Some other manufacturers’ flight controller interfaces cannot provide enough power for two C-RTK 9Ps, it is recommended to provide a 5V (more than 2A current) independent power supply for C-RTK 9ps
Hardware
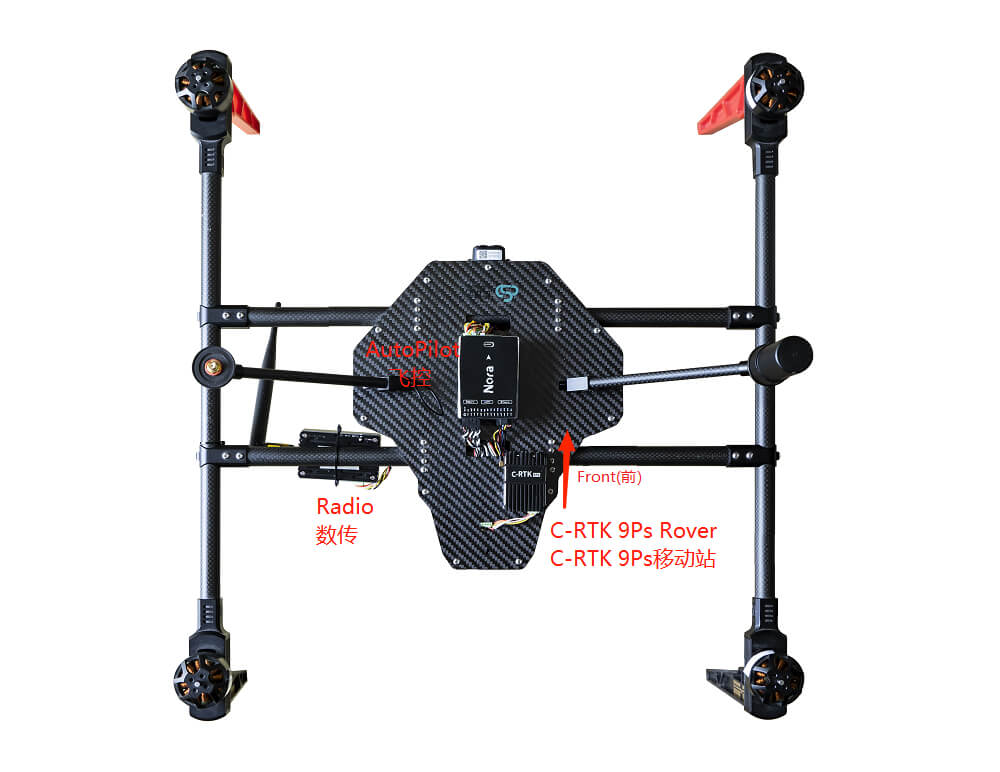
C-RTK 9Ps(Rover)*2
X7+ flight controller*1 (other flight controllers can also be used)
NOTE: The C-RTK 9Ps needs to run firmware 1.13 and later; the flight controller needs to run firmware 4.04 and later.
Hardware connection
Each of the two RTK modules is connected to an antenna, and the module installation distance is not required.
The horizontal distance between the two antennas should be at least 30 cm apart, and the greater the distance, the higher the direction accuracy.
The first C-RTK 9Ps is connected to the X7+ flight control GPS interface, and the second module is connected to the 7+ flight control UART4 interface.
Flight control parameter settings
Please go to Mission planner->Configuration and debugging->All parameter list
- SERIAL4_PROTOCOL = 5 ("GPS") (assuming the 2nd GPS is connected to serial port 4)- GPS_TYPE = 17(“moving baseline base”)- GPS_TYPE2 = 18 (“moving baseline rover”)- Set the GPS_POS1_X/Y/Z and GPS_POS2_X/Y/Z parameters for the GPSs - GPS_POS1_X, GPS_POS1_Y, GPS_POS1_Z (the first GPS’s position from the vehicle’s IMU or center-of-gravity) - GPS_POS2_X, GPS_POS2_Y, GPS_POS2_Z (the second GPS’s position from the vehicle’s IMU or center-of-gravity)- AHRS_EKF_TYPE = 3(use EKF3)- EK2_ENABLE = 0(disable EKF2)- EK3_ENABLE = 1(to enable EKF3)<br/>
- EK3_MAG_CAL is not used for this feature so it can be left at its default value (“0” for Plane, “3” for Copter, “2” for Rover)- EK3_SRC1_YAW = 2 (“GPS”) or 3 (“GPS with Compass Fallback”)
Testing
In a location with a good GPS reception point, park the vehicle at a landmark some distance away and then check that the heading on the ground station matches. Rotate the vehicle and ensure the heading on the ground station updates correctly.
If the heading is reversed, then the GPS_POS_xxx parameters have probably been set incorrectly.
Note that it can take some time for the two GPS modules to get a sufficiently good fix for yaw to work. The ArduPilot GPS driver validates that the fix is good enough in several ways:
that the rover GPS module is in fix type 6 (fixed RTK), that the reported distance between the two modules matches the distance given by the GPS position parameters within 20%, that the reported heights of the two GPS modules match the attitude of the vehicles, and is within 20% of the distance between the two GPS modules
Then follow the prompts to install the U-center software. During the installation, you will be prompted to install the driver. Make sure that only the Standard Driver For is checked Windows, then click on the step, follow the prompts to install, as shown below.
Connect the C-RTK 9Ps to the computer using a USB cable
Open the U-centre software, click the connect button, and select the base/rover that needs to be upgraded.
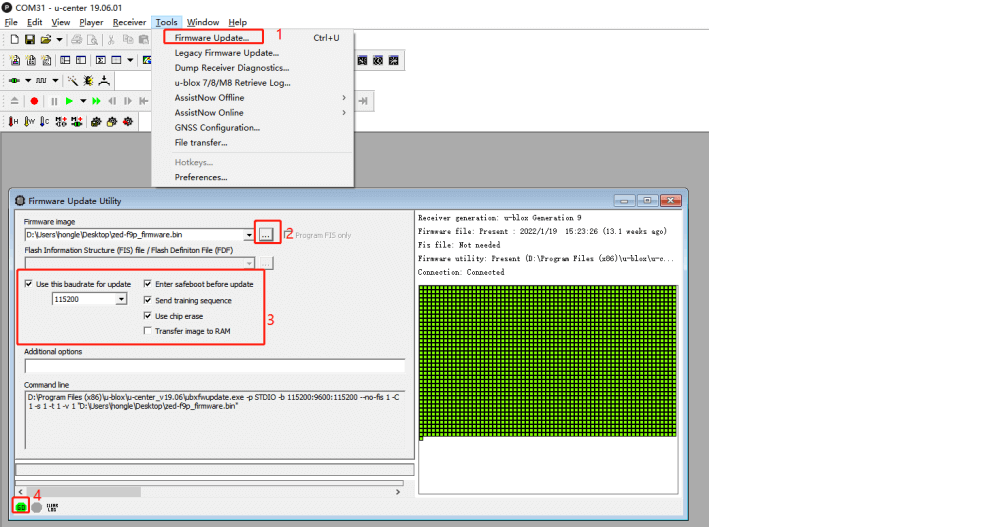
Select Tools->Firmware Update, and click the “…” icon to the right of the Firmware image checkbox to find and select the firmware file.
Set as shown below to complete the configuration
Click “GO” to start the firmware upgrade
NOTE: Upgrading the firmware generally only takes about a minute. If the programming is successful, the upgrade interface will be displayed in green; if the upgrade is aborted, the interface will be displayed in red. If the programming process is interrupted, or there is no response for a long time, you need to power on again and press the operation to program once.
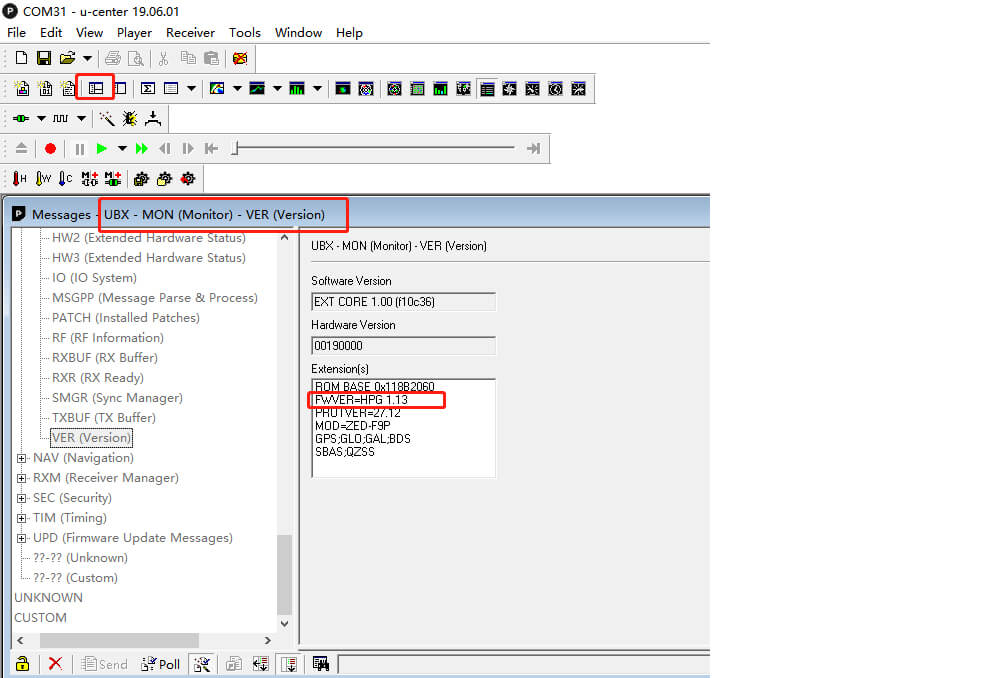
View current firmware version
When the base station/mobile station is connected to U-centre, click the View option to enter Message View -> UBX -> MON -> VER, the interface is as shown below:
Reset Parameters
When you want C-RTK 9Ps to work with the default parameters or when the flight controller prompts appear when GPS configuration fails, you can reset the parameters using the following steps.
Connect the C-RTK 9Ps to the computer using a USB cable